
The Philippines, Our 2 Week Itinerary

Introduction
Friends of ours had just snagged a deal with Cebu Pacific Air and it was no hard decision jumping on board.
Our tickets were $250 AUD RETURN Sydney to Manila, (I KNOW, RIGHT?! – It would be rude not to take advantage of this deal), and so we booked without hesitation, please read on to hear about our epic adventures to this breathtakingly-beautiful country!
The Philippines are made up of over 7000 islands, but with only a two-week trip planned we could only visit a few, and so we chose El Nido, Cebu/Moalboal, and Siargao.
Departing Australia
Arriving in Manila at 5:25pm, we organised a ‘Smart’ SIM Card just outside the airport terminal, (We just needed data and the package included 16gb Data + 30gb YouTube), which cost PHP 1000 / $27 AUD.
We only bought the one sim card and shared it for the duration of our two-week trip.
Although there were the cheap options of taking a motorbike/car/van transfer to our hotel, we decided to walk the 30 minutes from Manila International Terminal to stretch our legs and gain some culture shock straight up.
We stayed at the Courtyard Hotel, which we booked through Booking.com, and it was great just for our first night. We could order food from their in-house kitchen when we arrived and we settled in before our departure the next day.

El Nido

The next day we were making our long journey from Manila to El Nido, which started with a PHP 250 / $7 AUD Total Hotel Shuttle to Manila Domestic Terminal, only 5 minutes down the road from our accommodation.
Our flight with Air Asia arrived at Puerto Princesa Airport, Palawan at 8.55am, followed by a 5-hour minivan trip north to El Nido. The minivan cost us PHP 500 / $13 AUD per person and although there are other options including a bus, they can take around 6-8 hours and we were told this was the preferred method of getting to El Nido.
TIP: Make sure to sit in the front as this drive will feel like a rollercoaster in the back.
We had a quick stop for lunch at the halfway point and ordered a dish of rice and veggies for PHP 140 / $4 AUD and a delicious mango smoothie for PHP 100 / $2.70 AUD.
The van dropped us off at the El Nido Bus Terminal and it was a 15-minute walk to our accommodation ‘Neela’s Tourist Lodge’, where we spent two nights before our friends flew in to join us.
The bus terminal is halfway between the two areas people generally stay at, ‘El Nido Town’ where the tours depart from, or ‘El Nido Downtown/south of Corong beach.’ From one end of town to the other it is a 10-minute Tuk Tuk drive and costs PHP 50 / $1.35 AUD total for 2-3 passengers.
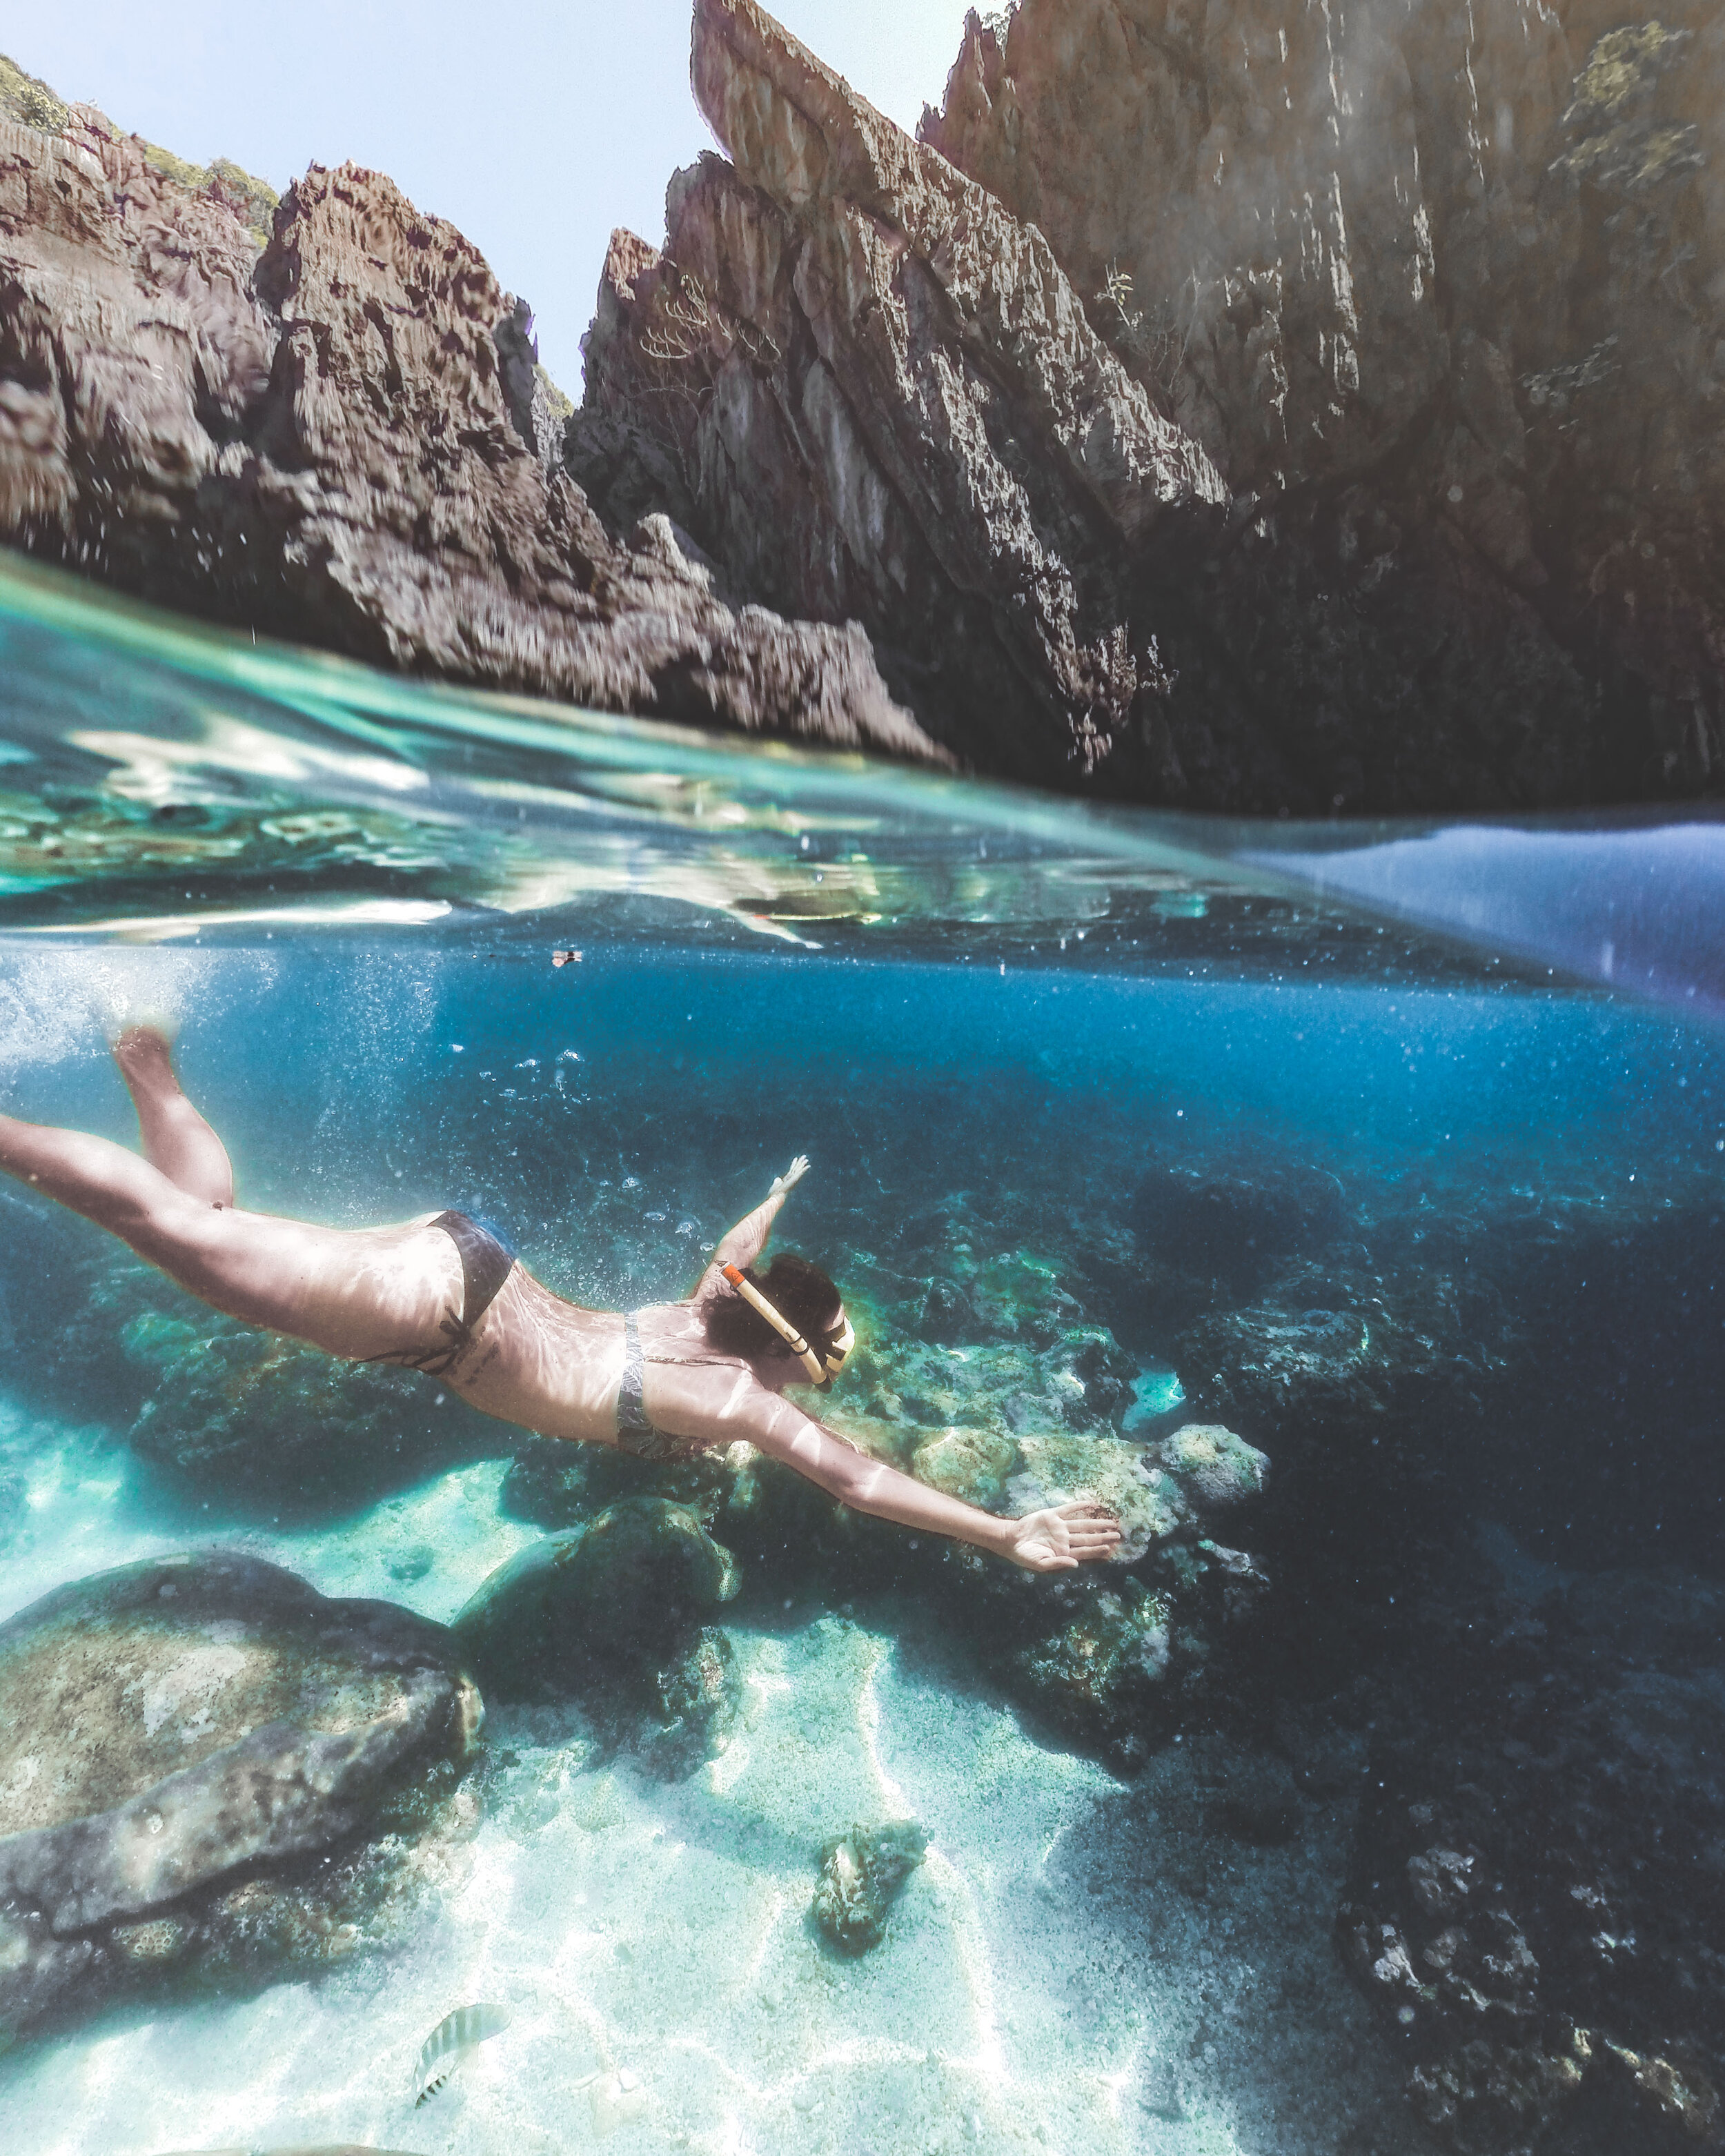
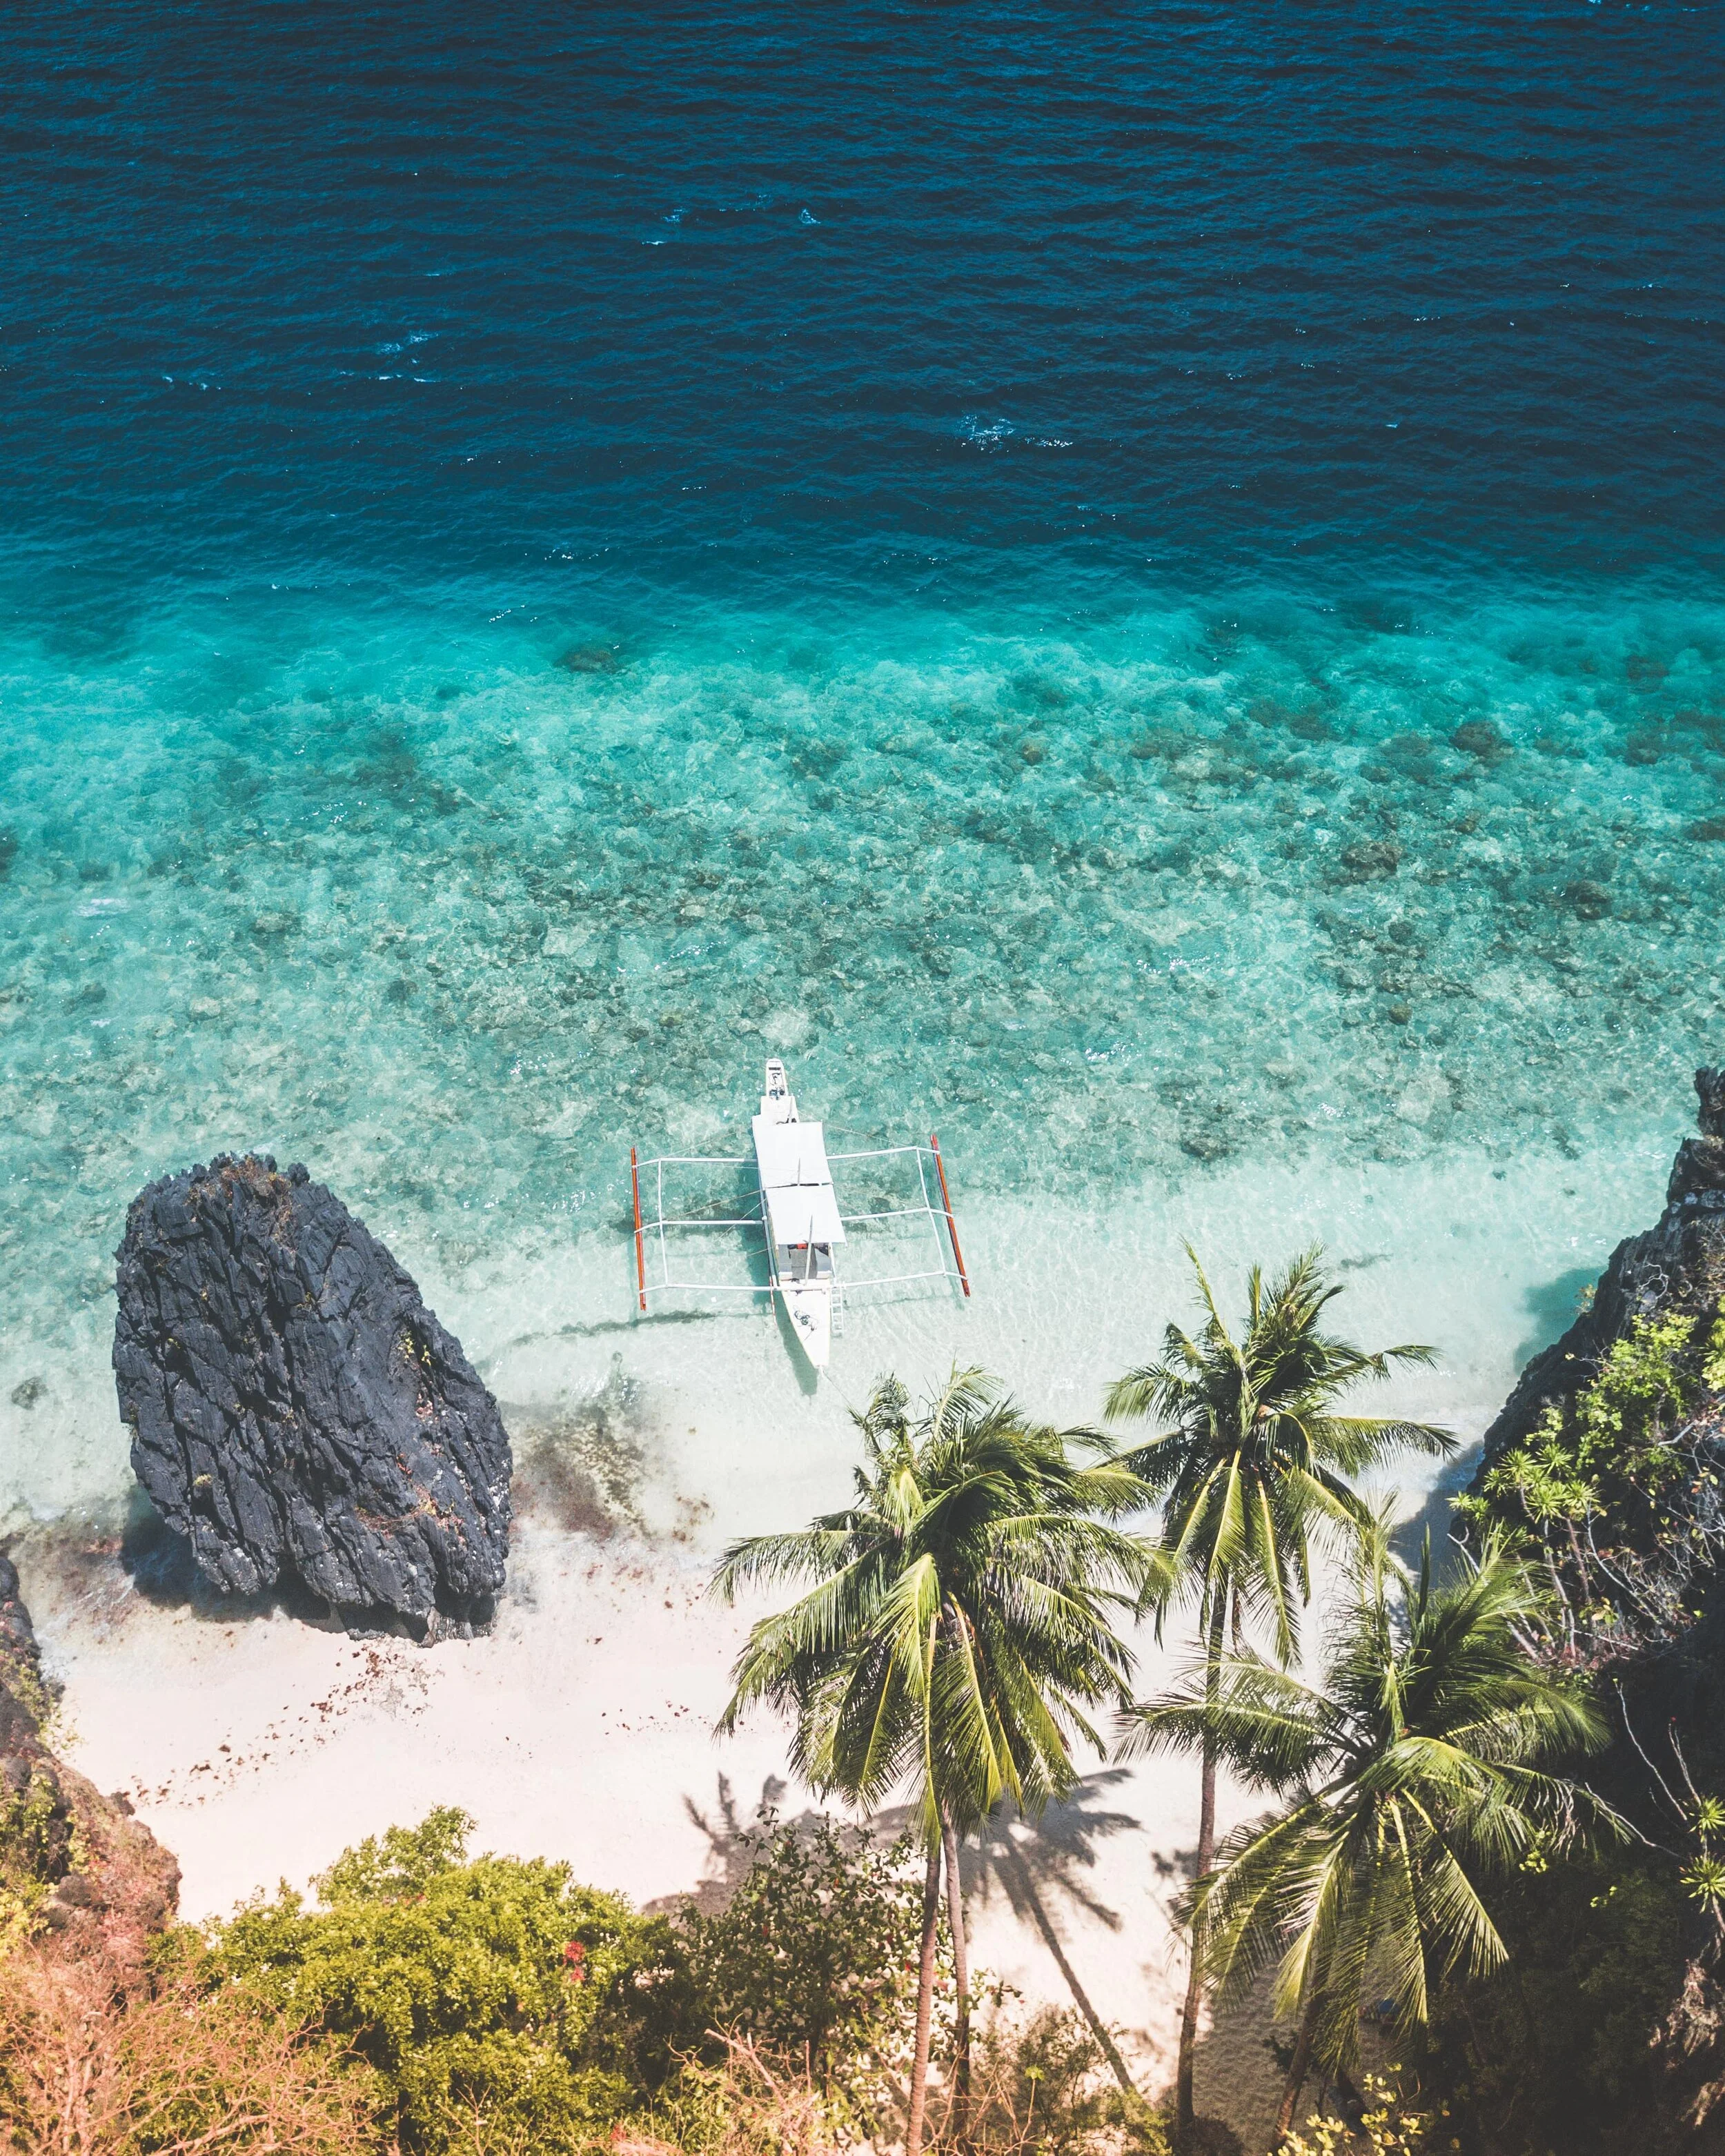
During our 6 days in El Nido, we spent our time relaxing by the beach, exploring the island by scooter, and going out on a few Island-Hopping Tours.
There are 4 different tours you can do out to the Bacuit islands, Tour A, B, C & D.
All tours can be booked online through Klook, via your accommodation or vendors in the street. Tours should include;
A local English speaking guide
Delicious BBQ Seafood Lunch
Water
Snorkelling gear
Hotel Pick- up and drop-off
Note that upon booking any tours, you must pay a one-off PHP 200 / $5.50 AUD per person for the El Nido Tourism Development Fee ‘Eco-Tax” which is valid for any future tours within a 10-day period.
Its key purpose is to limit the tourism impact on the environment and fund environment and tourism-related projects.
All tours are highly ‘environmentally-conscious’, being plastic-free and smoke-free.
We chose to do TOUR C on our second day but didn’t choose a private tour as it was only the two of us and we thought it would be interesting to compare a regular tour with a private tour.
We booked online through Klook.com and it cost us PHP 1250 / $34.50 AUD per person.
We left at 9.45am after the private tours departed, and visited Helicopter Island Hidden and Secret Beach, Tapiutan Island, plus a lunch stop at the Matinloc Shrine. We were back at El Nido port by 5pm.


The next day our friends arrived and we chose to hire scooters and go exploring, first visiting Nacpan Beach a beautiful palm tree-lined beach with soft white sand clear aqua water.
For dinner, we took the scooters and drove south to Las Cabañas Beach, where we ventured through the jungle to find the most epic hidden jungle Hotel/Restaurant named the ‘Birdhouse’, which is 100% worth the detour for a secluded accommodation option or for a delicious night out.
TOUR B was the next activity planned with the group, and this time we decided on doing a private tour.
We booked it with the Art Café located near the El Nido Port, and it cost PHP 1600 / $45 AUD per person.
One HUGE benefit of doing a private tour was the fact it was just our group on the boat, and not being sardined in with 15-30 other people like the regular tours.
On this tour, we visited Populcan Island, Snake Island, Codugnon Cave, Cathedral Cave, and Pinagbuyutan Island.


TIP: When you arrive at the port for your tour departure, check with the company you booked with to see if you can depart as soon as the Port Authority makes the clearance for all boats, so you get a head start and beat other tours to have more time on the islands by yourself.
We didn’t have enough time to do all 4 tours so for our last day we decided on TOUR A.
Once again, we chose to do a private tour as it is 100% worth the money, and this one came to PHP 2300 / $63 AUD per person. We visited Big Lagoon where we hired kayaks for an hour, Secret Lagoon, Shimizu Island, Entalula Island and finished off with 7 Commando Beach.


Accommodation
All our accommodation was booked through Booking.com, and we chose based on location and reviews. Location for us is generally one of the most important factors when choosing where to stay, as it can save you money on transport and you’re right where you want to be.
TIP: Check the total number of reviews vs the number of stars, i.e. A place with 1000 x 3 Star Reviews will most likely be better than a place with 50 x 5 Star Reviews.
Below is where we stayed for the duration of our trip and an avg cost in AUD per person/per night;
El Nido | $20-$25 pp/pn
Neela’s Tourist Lodge
JM Pensionne House
Novie’s Tourist InnMoalboal | $30 pp/pn
Moalboal TropicsCebu City | $60 pp/pn
Montebello Villa HotelSiargao | $20-$40 pp/pn
Greenhouse Siargao
Transport
LAND: We found the best way to get around was hiring scooters and exploring on our own.
You have complete freedom and flexibility to visit whichever areas you prefer, whilst keeping your costs low, comparing to jumping on a paid tour. Our bikes cost PHP 500 / $13.50 AUD per bike/per day, and we recommend asking for a helmut – safety first no matter which country you’re in.
AIR: Our internal flights were fairly cheap, costing approx. $30-$50 AUD per flight, with one exception Siargao to Manila $130-$150 AUD per flight. It’s recommended to book your flights in advance to snag the best availability and price.
Food Recommendations for El Nido:
Boodle Fight
One of the best fried rice dishes we’ve ever had.
Bella Vita
Great water/island views.Trattoria Altrove
The BEST and freshest wood fired pizza in town.The Happiness Express Cafe
Hip vibes with delicious healthy food and vegetarian options.The Art Cafe
Simple but delicious, can book your tours here too.
More Tips:
Before leaving on a trip to the Philippines, we recommend getting any cash you plan on taking, exchanged before you go (and into smaller notes if possible as some vendors find it difficult to provide change), as the ATM’s tend to run out of money – even the larger bank atms too.
If you visit El Nido, try the BPI ATM around the corner from the Art Café, it will be the last atm to have money if the others have run out, also taking note the atm’s are stocked on a Monday.
If you are prone to travel sickness like we are, head to the pharmacy inside of the grocery store next to Neela’s Tourist Lodge and ask for the tablet brand name ‘Bonamine’, as for us they worked great, we didn’t feel drowsy whilst trying to enjoy our island hopping, and we didn’t get a parched mouth like other brands.
If you are unfortunate enough to get sick like we did, go to the grocery store and buy ‘Pocari Sweat’ Water – the name doesn’t make it sound great but it is an electrolyte drink that will bring you back to life.
Cebu/Moalboal

We took the long journey back from El Nido down to Puerto Princesa Airport, for us to fly to our next destination Cebu, where we would spend 3 full days’ waterfall-hopping.
From Cebu Airport down to Moalboal (where we would be spending the majority of our time), we were told it could take anywhere between 2-5 hours due to traffic. We travelled during the peak period, leaving the airport at 5.40pm and arriving 3 hours later at 8.40pm. The van transfer cost PHP 450 / $12.50 AUD per person.
Cebu City peak traffic is from 6am-8am / 4pm-7pm, so remember to allow enough time for your flight and check-in.
We checked into our accommodation ‘Moalboal Tropics’, a hotel with a delicious dinner menu, large air-conditioned rooms and a huge guest pool with slides.
The next day, we once again hired scooters from our hotel and headed out on an adventure.
We visited several incredibly picturesque waterfalls within the area, the furthest being 45-minutes to an hour away.
We visited Dau Falls, which comprised of three separate waterfalls, Binalayan Hidden Falls, which had several jumping points for the avid jumper, and of course the well-known Kawasan Falls, which turned out to be one of our favourites as there is more than just the one waterfall you see at the bottom. Hint: At Kawasan Falls keep walking past the shops up the staircase and keep walking for about 10-15 minutes until you can go no further, there will be a few surprises at the end waiting for you.
Also, when you are leaving Kawasan Falls, there are usually a few locals finishing off a batch of freshly cooked, house-made chocolate donuts which are too cheap and delicious to pass up.
TIP: We woke up early every day and headed out around 5.30am/6am to ensure we had these places to ourselves and not be swarmed by a million-other people, and we highly recommend doing the same.
NOTE: Some of these waterfalls require you to pay for a guide upon entry which can cost around PHP 70-80 / $2-$2.50 AUD per person, and a parking fee for your scooter if you have one, only costing PHP 10-20 / $0.30-$0.50 AUD.
On our last night, we all chose to head back to Cebu City to be closer to the airport for our departure flight the next day. We decided on a little luxury for one night and splurged on the Montebello Villa Hotel. This accommodation was palatial with two impressive pools, gardens, an extravagant breakfast and lunch menu in a beautiful setting, with spacious and elegant rooms.


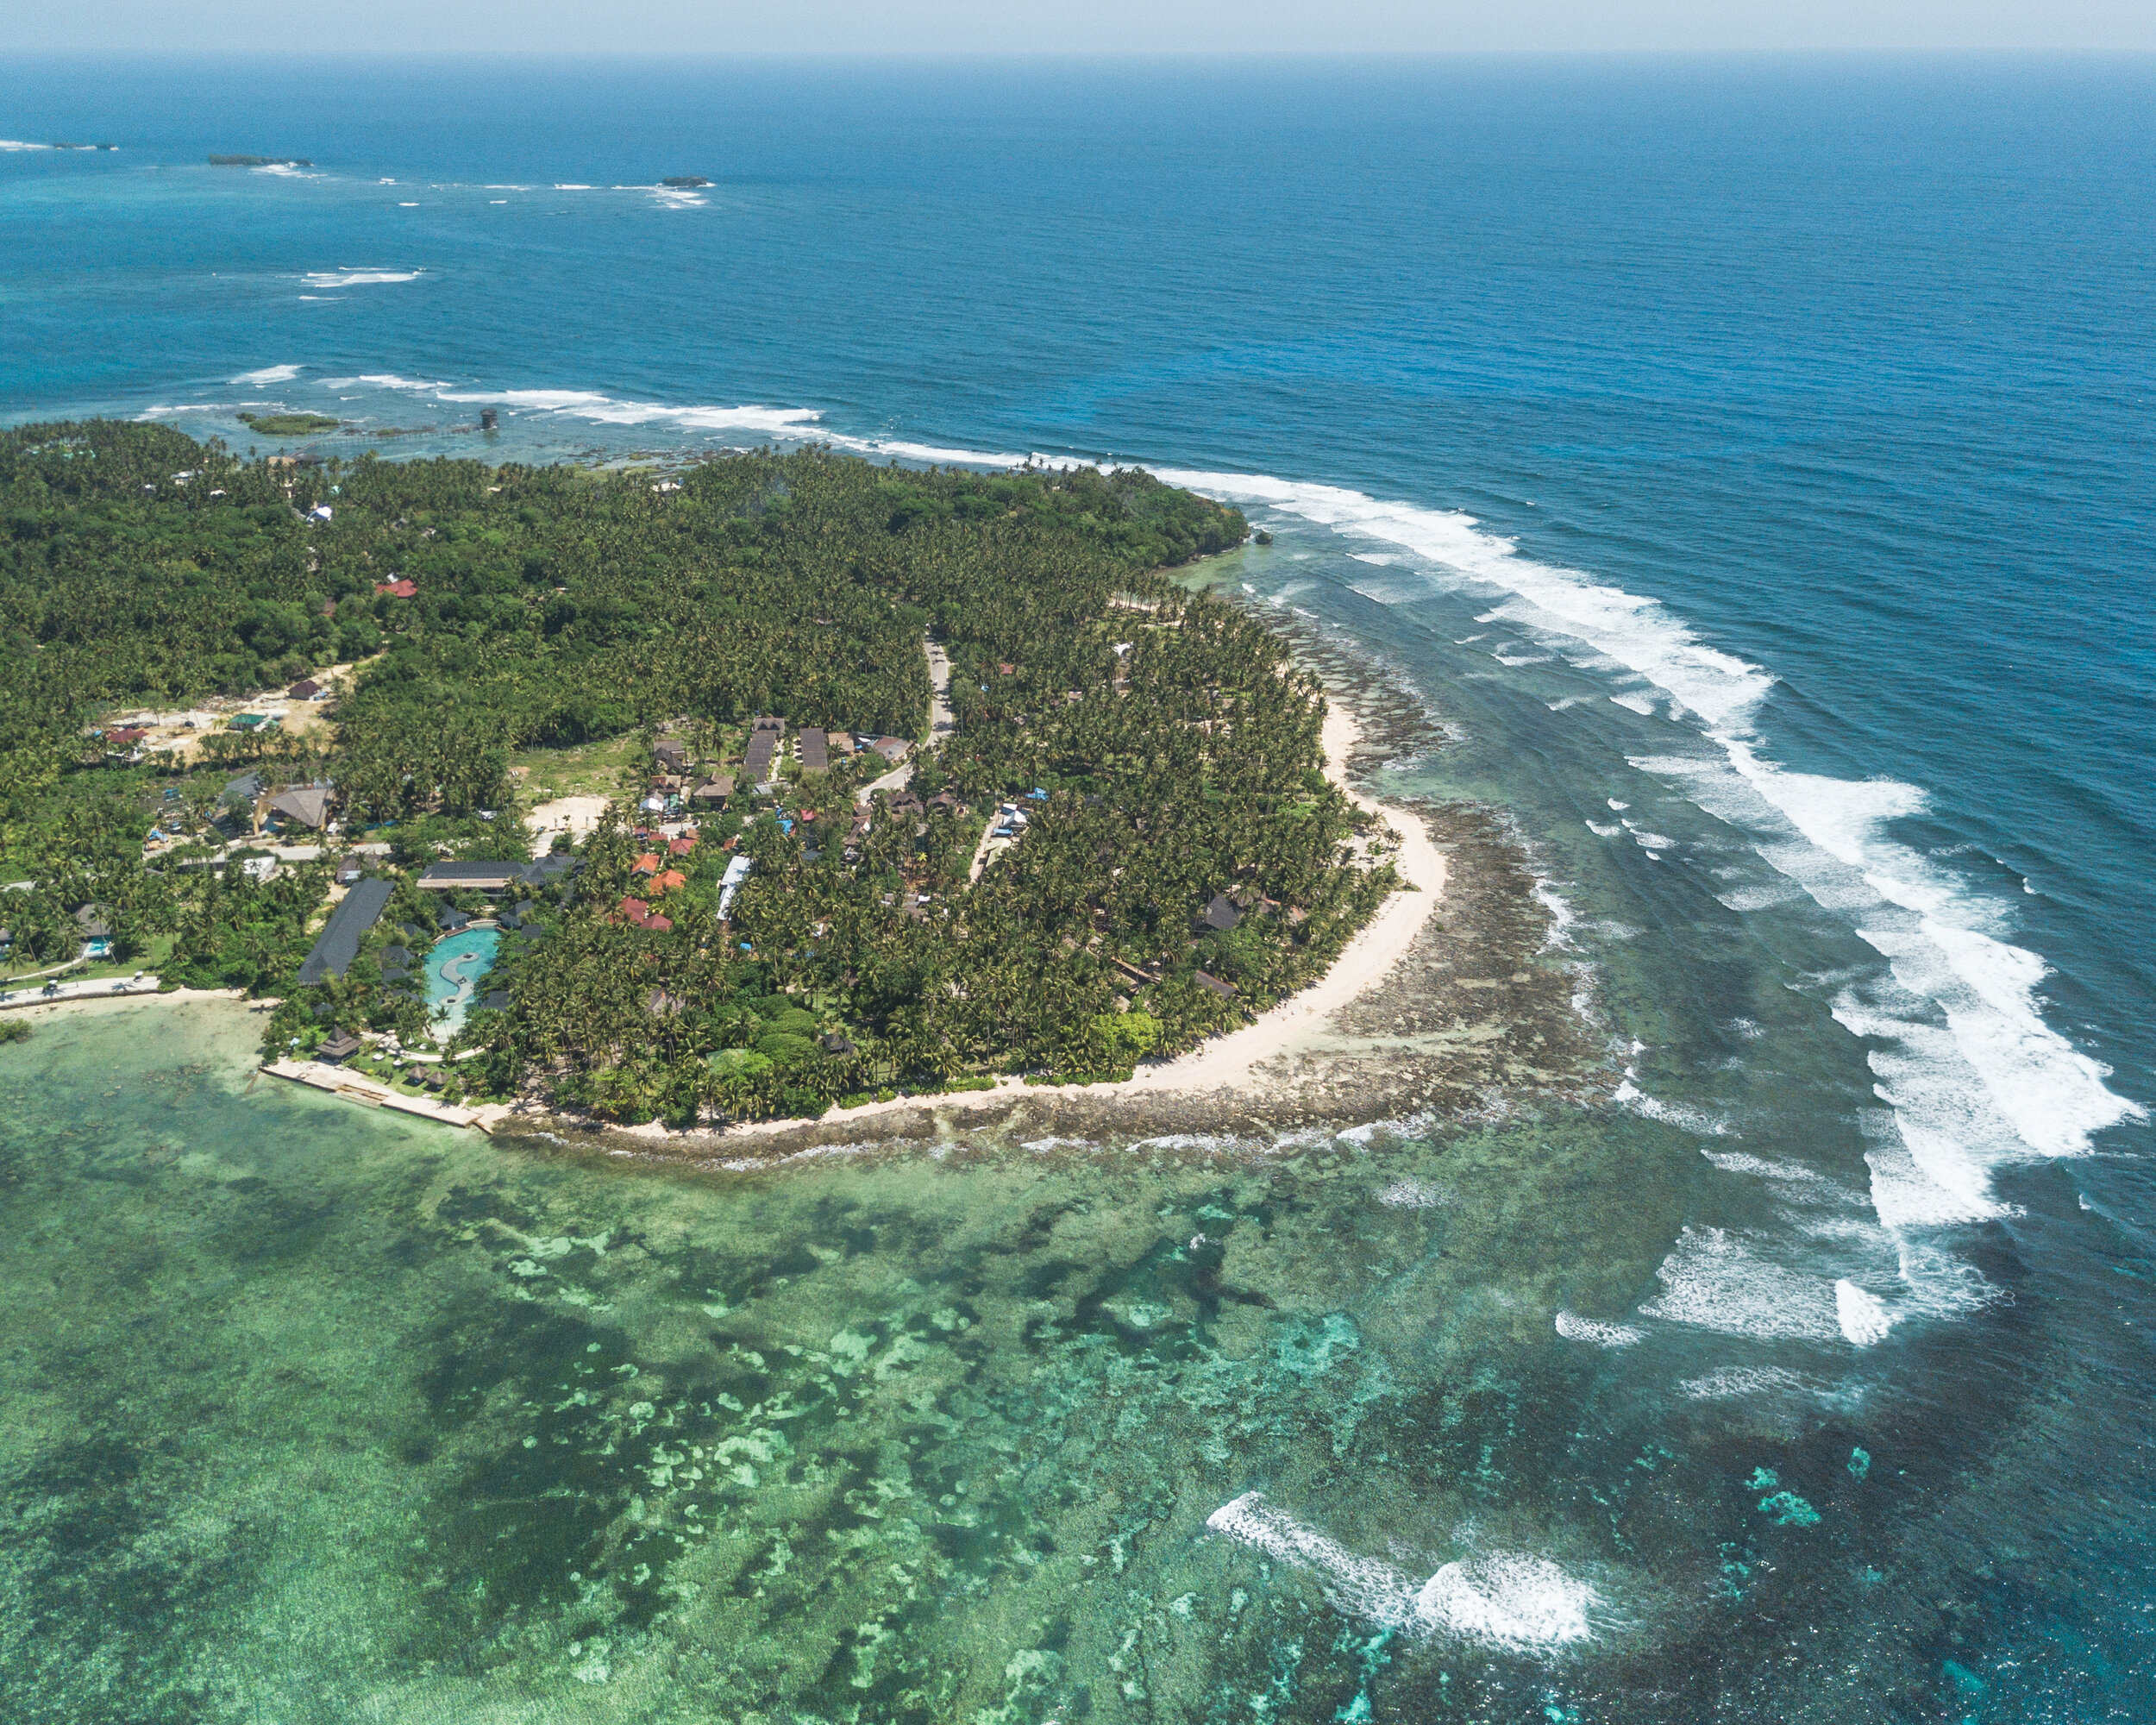
Siargao

Siargao is a very chill, and relaxed town with the most amount of palm trees possible on one island, lots of yummy food eateries, plenty of yoga and you can surf until your hearts’ content.
The plane view coming in to land at Siargao Airport is phenomenal, and has you eager to start your coconut-sipping, hammock swinging chill out time in this peaceful paradise.
The transfer time from the airport to the General Luna town is 35 minutes on average and can be organised through your accommodation or on arrival.
Our time here was a slower vibe than our previous week, which was totally fine by us!
We checked into our AMAZING accommodation at Greenhouse Siargao, and our group had a waterfront villa for the duration of the trip.
During our time here we went surfing, done a yoga class, checked out a few of the well-known sights such as the Sea of Palms Viewpoint, Palm Tree Road, and the Palm Tree Rope Swing – which is 30 minutes from General Luna and you can spot it from the red Maasin Bridge.
Food Recommendations in Siargao
Greenhouse Cafe
Healthy and delicious with vegan/Vegetarian options. Also, their menu for in-house guests is to-die-for!Bravo Spanish
Delicious Spanish tapas with ocean views and live music. Walk past the skate bowl at the entrance.Buddha
Great Thai Restaurant.Trattoria Altrove
Freshly made pizza from the chain restaurant we recommended from El Nido.Siargao Corner Cafe
Cheap and yummy waffles.TIP: We highly recommend getting enough cash before you arrive as there is only 1 ATM in town and it’s often closed. There is an option of going to ‘Ronaldo’s Restaurant’ and withdrawing money, however there is a 6% fee.


Well that concludes our Philippines Blog, and it’s safe to say our entire group had an absolute blast exploring these three islands in the Philippines, and we are eager to get back and explore the 7000 more!
We hope this blog post has inspired you to visit the Philippines if it wasn’t already on your radar, and if you are planning your own adventure here and have any questions, please leave them in the comments box below.
Below is a sneak peak of our Philippines VLOG Part 1 out of 5, and you can head over to our YouTube Channel to see the following parts!
Until next time,
Sarah and Amy